WooCommerce live streaming integration with MyLiveCart takes under 10 minutes install the plugin, connect your store with an API key, and your products are ready to tag and sell in your first live event.
This guide covers the exact setup steps, what the live shopping experience looks like for you and your customers, and how to run your first event successfully.
Quick Answer: To integrate live streaming into your WooCommerce store, install the MyLiveCart plugin from the WordPress Plugin Directory, activate it, and enter your MyLiveCart API key. Your WooCommerce product catalog syncs automatically. You can then create live events, tag products in real time, and let customers purchase directly through your existing WooCommerce checkout no developer required, free plan available.
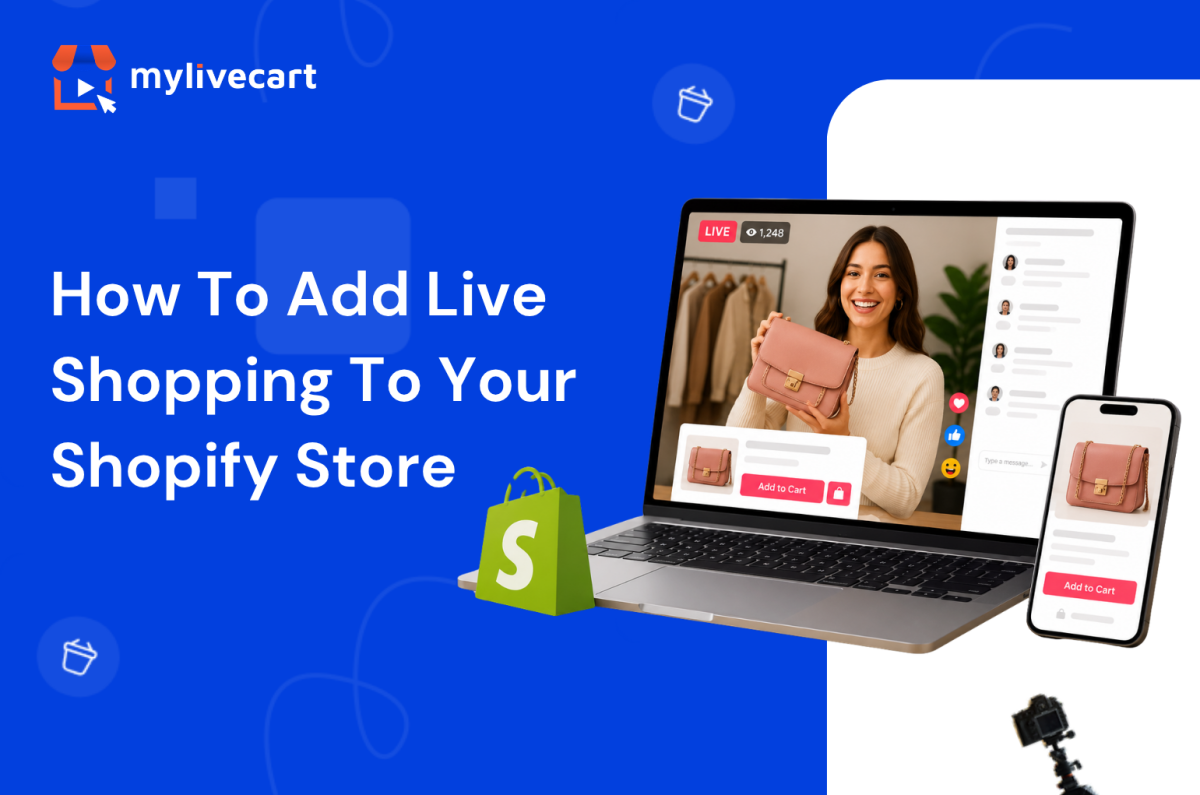
Why Add Live Shopping to Your WooCommerce Store?
Live shopping turns a passive browsing experience into a real-time conversation. Instead of relying solely on product pages, you can demonstrate products live, answer questions instantly, and let customers buy while they watch.
Brands running live shopping events consistently report stronger results than standard product page traffic. According to McKinsey, live commerce conversion rates can reach 30% up to 10x higher than traditional ecommerce.
Increase Customer Confidence
Customers can see products demonstrated live understanding features, sizing, texture, and usage before purchasing. This clarity reduces hesitation and increases buying confidence.
Start Free Today →
Improve Conversion Rates
Live demonstrations combined with real-time interaction remove the uncertainty that causes cart abandonment. Customers who ask a question and receive an immediate answer are significantly more likely to complete a purchase.
Build Stronger Customer Relationships
Live chat creates a direct connection between your brand and your customers one that product pages, email campaigns, and social media posts cannot fully replicate. Viewers who feel heard become repeat buyers.
Encourage Repeat Engagement
Customers who buy during a live event return for the next one. Live shopping builds a loyal viewer base that looks forward to your broadcasts rather than passively scrolling past your ads.
Reduce Purchase Uncertainty
When customers see products in action and receive answers in real time, they buy the right product the first time reducing returns and post-purchase regret.
What You Need Before You Start
Before installing the plugin, make sure you have:
- A live WordPress site with WooCommerce installed and active
- A MyLiveCart account — free to create, no credit card required
- Published products in WooCommerce (they sync automatically after connection)
- A device to stream from — a smartphone or laptop webcam works for your first event
- A stable internet connection for broadcasting
No server configuration, no API development, and no third-party streaming software required.
How to Connect MyLiveCart to Your WooCommerce Store
Step 1 — Create Your MyLiveCart Account
Go to MyLiveCart and create a free account. The Starter plan is $0 with no credit card required it includes 2,000 viewing minutes per month, unlimited live events, and the full WooCommerce plugin.
Once your account is active, go to your MyLiveCart dashboard.
Step 2 — Copy Your API Key
Inside the MyLiveCart dashboard:
- Navigate to Settings or Integrations
- Open the API Key section
- Copy your unique API key
Keep this tab open you will paste the key into WordPress in Step 4.
Step 3 — Install the MyLiveCart Plugin
In your WordPress admin panel:
- Go to Plugins → Add New
- Search for MyLiveCart
- Click Install Now
- Click Activate
Once activated, a MyLiveCart menu item appears in your WordPress admin sidebar.
Step 4 — Connect Your Store With Your API Key
- Click MyLiveCart in the WordPress admin sidebar
- You will see the plugin settings page with an API key field
- Paste the API key you copied from your MyLiveCart dashboard
- Click Save & Connect
Your WooCommerce store is now connected to MyLiveCart.
Step 5 — Sync Your Product Catalog
After connecting, MyLiveCart automatically imports your published WooCommerce products. The sync runs in the background and typically completes within 30 seconds to a few minutes depending on catalog size.
Once complete, all your products including names, images, prices, and variants are available to tag during live events.
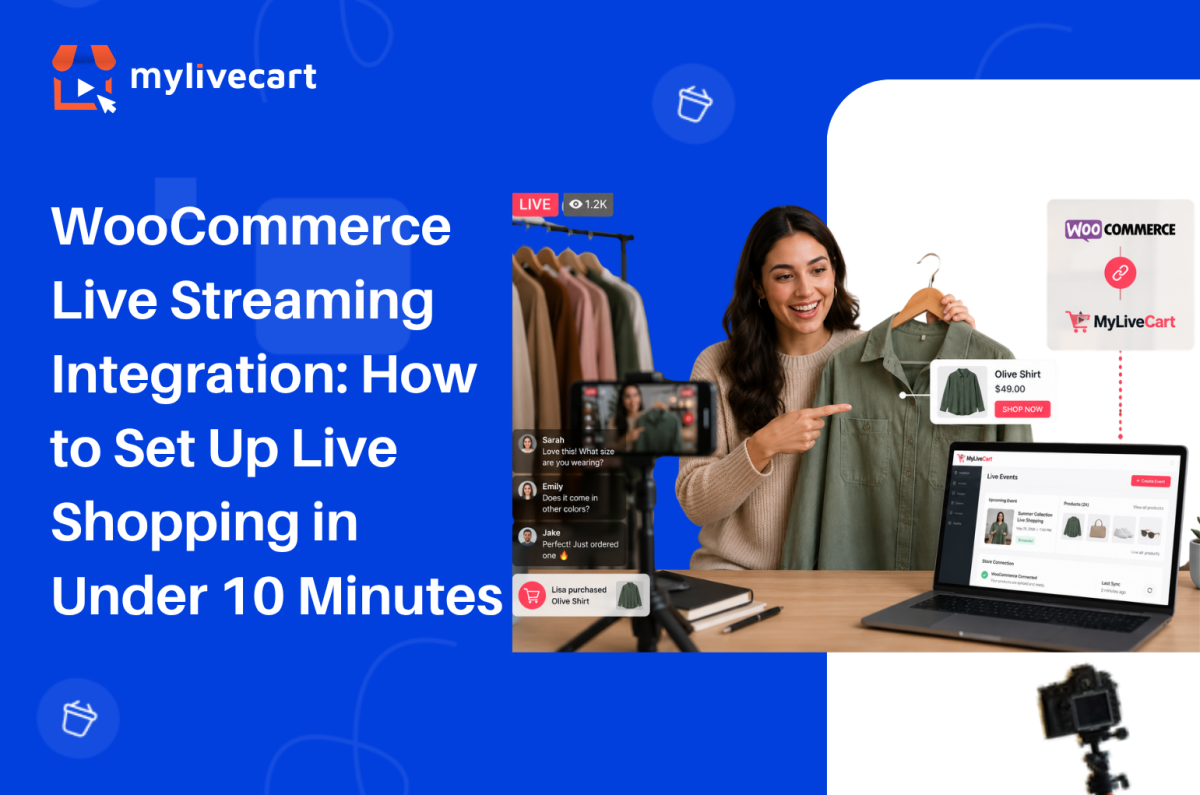
Step 6 — Embed the Live Stream on Your Store
MyLiveCart provides a shortcode or widget block that embeds the live stream player on any page of your WooCommerce store. Common placements include:
- Go to the page where you want the stream to appear your homepage, a dedicated live shopping page, or a product category page
- Add the MyLiveCart shortcode or widget block from the plugin settings
- Save or update the page
Your customers will see the live player on your store when an event is active, and they can purchase products in-stream using your existing WooCommerce checkout. No redirect, no separate cart, no friction.
Setup complete. Your first live event is ready to create.
Try MyLiveCart Free →
What Happens After Integration
Once your WooCommerce store is connected, the live shopping workflow runs end to end through MyLiveCart and your existing WooCommerce infrastructure.
Before the Event
- Create a live event in the MyLiveCart dashboard — add a title, date, time, and thumbnail
- Select featured products from your synced WooCommerce catalog
- Share the event link via email, social media, or embed it directly on your store
During the Event (You)
- Go live directly from your browser or mobile device — no external streaming software needed
- Tag products in real time as you discuss them — they appear as clickable buy buttons in the stream
- Respond to live chat — answer questions, handle objections, create urgency
During the Event (Your Customers)
- Watch the stream directly on your WooCommerce store — no app download, no redirect
- Click buy buttons as products are tagged on screen
- Complete the purchase through your existing WooCommerce checkout — same payment gateway, same order flow
After the Event
- Review analytics in your MyLiveCart dashboard — total viewers, peak concurrent, products clicked, products purchased
- Access the recording for replay on Pro and Business plans
- Find all live event orders in your WooCommerce dashboard alongside regular orders — nothing changes in your fulfilment workflow
Why Use MyLiveCart Instead of Going Live on Social Media?
Many WooCommerce brands already use Instagram Live, Facebook Live, or TikTok Live. These platforms help with visibility — but they do not deliver a seamless shopping experience on your own store.
| Feature | MyLiveCart (on your store) | Social Media Live |
|---|---|---|
| WooCommerce integration | ✅ Yes — native plugin | ❌ No |
| Product tagging during live | ✅ Yes | ⚠️ Limited |
| Existing checkout | ✅ Your WooCommerce checkout | ❌ No |
| Website ownership | ✅ You own the channel | ❌ Platform-dependent |
| Customer data access | ✅ Full order and analytics data | ⚠️ Limited |
| Live chat | ✅ Yes | ✅ Yes |
| Event analytics | ✅ Product-level data | ⚠️ Basic view counts |
| Algorithm dependency | ✅ None — your audience | ❌ Platform algorithm controls reach |
With MyLiveCart, customers remain on your WooCommerce store throughout from watching the stream to completing checkout. You own the data, the channel, and the customer relationship. See the full live shopping features to understand what is possible on your own store.
What MyLiveCart Adds to Your WooCommerce Store
The WooCommerce live streaming integration gives you a complete live shopping channel on top of your existing store. Here is what is included at each plan:
| Feature | Starter (Free) | Pro ($79/mo · $61/mo annually) |
|---|---|---|
| Live events | Unlimited | Unlimited |
| Products per event | Unlimited | Unlimited |
| Live viewers | Unlimited | Unlimited |
| Streaming duration | Up to 1 hour | Unlimited |
| Product tagging during live | Yes | Yes |
| In-stream buy buttons | Yes | Yes |
| Live chat | Yes | Yes |
| Real-time analytics | Yes | Yes |
| WooCommerce checkout | Yes | Yes |
| Viewing minutes/month | 2,000 | 15,000 |
| Recording / replay access | No | Yes |
| Simulcasting to social platforms | No | Yes |
| Shoppable Videos | No | Unlimited |
| MyLiveCart watermark | Yes | No |
| Overage rate | $15/1,000 min | $12/1,000 min |
See the full pricing breakdown to choose the right plan for your store.
Tips for Your First Live Shopping Event
Keep it short and focused
30–45 minutes is the ideal length for a first event. Feature 3–5 products and demonstrate each one in depth rather than rushing through a large catalog. Depth converts better than breadth.
Promote before you go live
Share the event link via email and social media at least 24–48 hours before the broadcast. An audience of 20 engaged viewers converts better than 200 passive ones.
Use live chat actively
Answer every question in real time. Address sizing, compatibility, ingredients whatever the common objections are for your products. Resolving hesitations in the chat drives in-stream purchases directly.
Tag products at the moment of demonstration
Tag a product the moment you start discussing it not at the end of the event. Contextual tagging (product appears while you are showing it) drives significantly higher click rates than listing products at the close of the stream.
Review your analytics after every event
Your MyLiveCart dashboard shows which products were clicked, when viewers dropped off, and at what point in the stream purchases happened. Use this data to improve your next event which products to lead with, what length works for your audience, and which questions to answer proactively.
A WooCommerce jewellery brand using MyLiveCart reported selling 98 items in 23 days after launching weekly live events starting on the free plan, with no production team.
Common Mistakes to Avoid
Trying to sell too many products
Showcasing your entire catalog in one event overwhelms viewers and reduces the quality of each demonstration. Start with 3–5 products and give each one proper attention.
Ignoring the live chat
Live shopping is interactive by design. Brands that ignore viewer questions during the broadcast lose trust and conversion opportunities. Treat the chat as your most important sales tool during the event.
Going live without promotion
Even the most polished event needs an audience. Promote your event at least 48 hours in advance through email, social, and your store homepage. Do not assume viewers will find it on their own.
Making events too long
Viewer attention drops significantly after 45–60 minutes for most product categories. Start with shorter events, learn where your audience drops off from analytics, and adjust from there.
Not testing equipment before going live
Audio issues, poor lighting, and unstable internet are the most common causes of early viewer drop-off. Test your setup microphone, camera, and connection at least 30 minutes before going live.
Frequently Asked Questions About WooCommerce Live Streaming Integration
Does MyLiveCart work with all WooCommerce themes?
Yes. The MyLiveCart plugin embeds via a shortcode or widget block that is theme-independent. It works with any WooCommerce-compatible WordPress theme including Storefront, Astra, Flatsome, Divi, and custom themes without requiring theme modifications.
Do customers need to download an app to watch?
No. The live stream plays directly in the browser on your WooCommerce store page. Customers watch on desktop or mobile without downloading anything. The player is mobile-responsive and works across all major browsers.
Does live shopping use my existing WooCommerce checkout?
Yes. In-stream purchases go through your existing WooCommerce checkout your payment gateway, tax settings, shipping rules, and order management remain exactly as they are. MyLiveCart does not replace or redirect your checkout; it adds a buy button layer on top of your existing store.
What happens to orders placed during a live event?
Orders placed during a live event appear in your WooCommerce order dashboard exactly like any other order. There is no separate fulfilment workflow your existing shipping, inventory management, and notification settings apply automatically.
Can I tag products during the live stream or do I have to set them up beforehand?
Both. You can pre-select products to feature when creating the event, and you can also tag additional products in real time during the broadcast. Anything published in your WooCommerce catalog is available to tag at any point during the stream.
How many viewing minutes does the free plan include?
The free Starter plan includes 2,000 viewing minutes per month with unlimited live events. For a 30-minute event, that supports approximately 65–70 concurrent viewers. The Pro plan at $79/month (or $61/month billed annually) gives you 15,000 viewing minutes per month. See the full pricing page for a complete breakdown.
Is a developer required to set up the WooCommerce integration?
No. The entire setup plugin install, API connection, product sync, and widget embed — is done through the WordPress admin panel and the MyLiveCart dashboard. No code changes, no server configuration, and no developer involvement required.
Start Live Shopping on Your WooCommerce Store Today
WooCommerce live streaming integration with MyLiveCart is one of the fastest ways to add a high-converting sales channel to your existing store without rebuilding anything, hiring a developer, or committing to an annual contract.
Install the plugin, connect your store, and run your first event on the free plan. You will have real performance data before spending a single dollar.
- Create your free MyLiveCart account
- Install the MyLiveCart plugin from the WordPress Plugin Directory
- Connect your WooCommerce store with your API key
- Go live — your products, your checkout, your audience